Our Sea Glass Jewelry Photography
Posted by Linda Jereb on 18th Oct 2019
By The Sea Jewelry - The Beginning
My online journey began over 30 years ago — BG (Before Google) — on a tiny webpage provided free by my first internet company, Interpath, the only provider on the Outer Banks at the time. The site was simple and clunky, a little WYSIWYG creation I built myself, long before we owned our own domain name, ByTheSeaJewelry.com.
Back then, digital cameras were brand-new, bulky, and outrageously expensive — far beyond what I could justify spending. Film photography still ruled the world. Some photo developers had just started offering an innovative add-on: a floppy disk containing digital copies of your prints. That little technological leap allowed me to begin documenting my earliest creations — a digital record that still survives today.
When I look back at those first pieces, I can’t help but laugh. Some designs make me wonder, What was I thinking? while others leave me asking, Why don’t I make settings like that anymore? Those early experiments, captured and saved on floppy disks, are more than just photos — they’re a snapshot of the beginning of a lifelong creative journey.
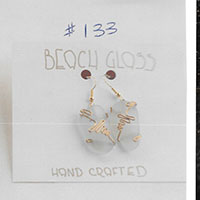
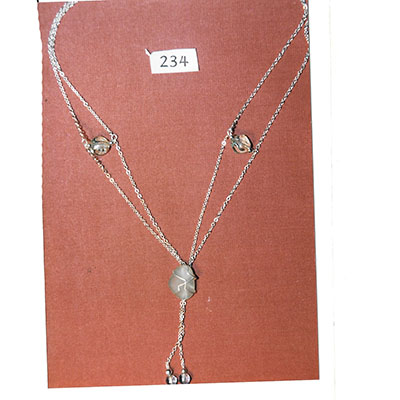
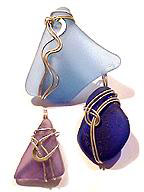
Here are a few examples of those very first pieces, lovingly preserved from those early days.
|
1995 |
1997 |
1997 |
||||
|
1996 |
1996
|
1997
|

The Birth Of Digital
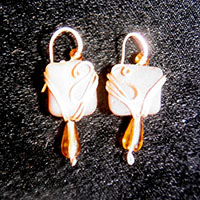
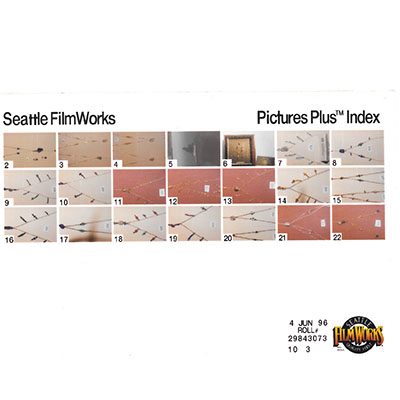
Shortly after the floppy option was available, I purchased my FIRST digital appliance, a $70 Mustek Scanner that I purchased at Sam's Club in Chesapeake Virginia (and actually got a $30 rebate on). The very first photos on the By The Sea site were in fact scanned on this device. For the time it was groundbreaking (for me at least). Items were laid flat on the scanner and then covered. I would edit using an old Adobe software that I got free with one of my computers.
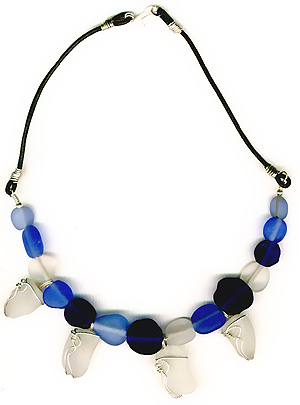
These are examples of photos that were scanned.
|
1997 |
1996 |
1997 |
1998 |
|
1998 |
1996 |
1998 |
|


 1996
1996
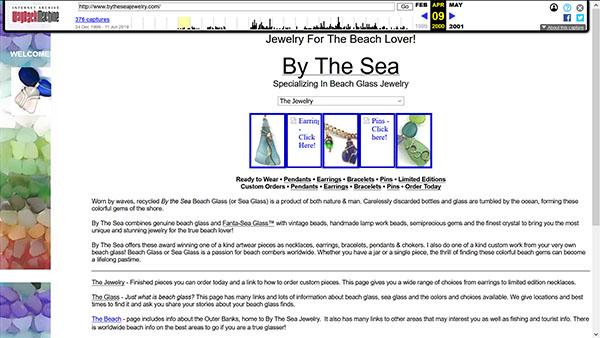
A screen shot from 2000
When we first acquired our WWW Domain.
Progress
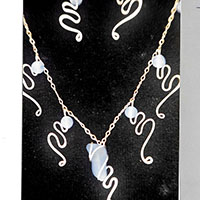
For a while, I continued using those early imaging methods to photograph my jewelry for the website. Then, about a year or two later, everything changed — I was gifted a Sony digital camera. It was big and clunky by today’s standards, but at the time it was cutting-edge, and it took fantastic photos. That camera, which cost around $800 back then (a small fortune!), came with a Carl Zeiss lens — and wow, did it deliver. Even more amazing, it stored photos directly onto a floppy disk that slid right into the camera itself.
I absolutely loved that camera. It opened up an entirely new level of quality and possibility for my business. Even though it was slow and heavy, it produced crisp, beautiful images that made my jewelry shine online. It even had a rotating LED screen on the back — a small but revolutionary feature that meant I didn’t have to crouch behind the viewfinder to get the perfect shot. I still have many of those original floppy disks tucked away (though, ironically, none of my current computers have a drive to read them!).
Eventually, I upgraded to a Sony F717, again with a Carl Zeiss lens. I still own that camera, although technology has far surpassed it now. It wasn’t without its issues — one problem was even recalled and repaired for free. When the same issue happened again, I decided it was time to explore other options.
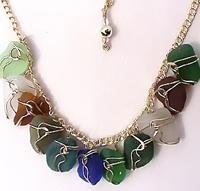
|
|
|
||
| 2006 | 2011 |
Today
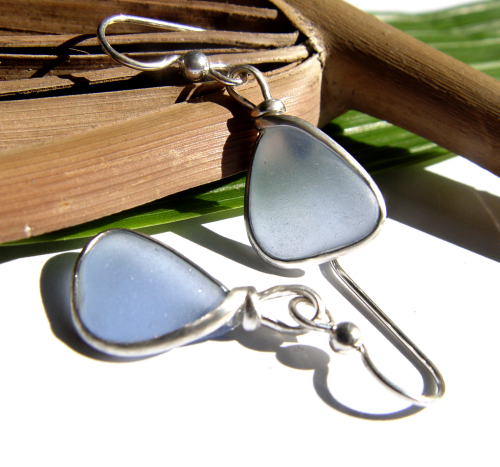
These days, our photography setup is worlds away from those early experiments. My husband — a meticulous researcher who never makes a decision lightly — chose our current camera: a Canon Rebel EOS T3, paired with a high-quality Canon macro lens. And ever since those early Sony days, we’ve continued to photograph every piece of jewelry in macro mode.
What does that mean? It means you’re seeing everything — every delicate curve, subtle texture, and tiny detail, even ones the human eye might miss. Recently, I’ve started capturing extreme close-ups so you can see the natural texture and those distinctive “C” markings that are only found in authentic, genuine sea glass. It’s a small detail, but for collectors and sea glass lovers, it’s a hallmark of authenticity.
Some pieces — especially earrings — are trickier to shoot up close. The macro lens needs to be about 5–6 inches away, and with earrings, you need more distance to get both pieces in focus. But even when perfection isn’t possible, the principle remains: photographing sea glass is a lot like photographing people. The closer you get, the more you notice every little imperfection. But those imperfections? They’re exactly what make each piece so uniquely beautiful.
Staging the Perfect Shot
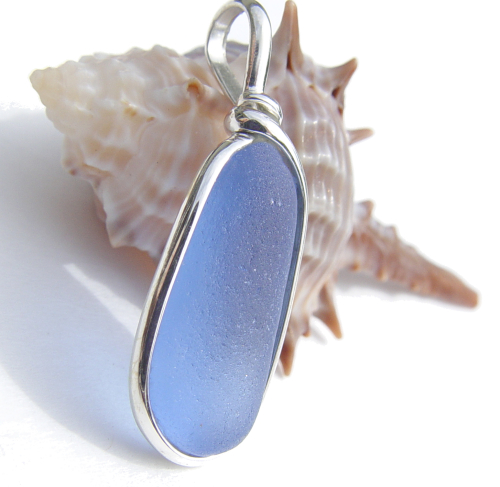
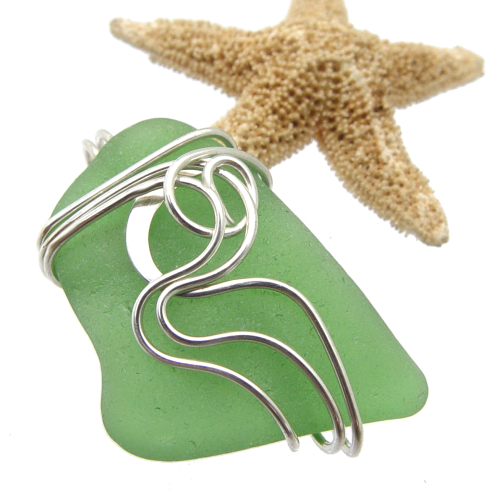
When I first started, my photography setup was as simple as it gets: direct sunlight, a white piece of paper, and a whole lot of editing. I quickly learned that propping the jewelry up brought out richer color and added depth to the images. That’s when I began using shells and starfish as props — and I noticed something interesting. These natural elements didn’t just make the photo prettier — they actually helped balance the colors in the shot. Even something as simple as placing a brown shell next to seafoam glass created a more accurate, vibrant color rendering.
But direct sunlight had its downsides. Strong colors like deep reds and purples were often washed out or distorted, and editing them was a painstaking process. Everything changed about 6 or 7 years ago when I discovered the photo cube. Today, nearly all of my staging still happens outdoors in natural sunlight inside a photo cube. I’ve found that nothing replicates the true color and translucence of sea glass better than real light.
Evolving Our Style
Our props have evolved over time, too. From shells and starfish, I moved on to more organic tropical elements like palm leaves and Florida blooms. Eventually, I realized that my collection of vintage glass bottles and jars made the perfect backdrop — after all, those are the very objects sea glass once was. Perching earrings on the lip of a bottle was an elegant solution that added a touch of storytelling to the photos.
I still use that technique occasionally, but sparingly — mostly because so many other jewelers have copied the style. I believe originality matters. When everyone starts imitating each other, the creativity behind the idea becomes diluted, and the result loses its magic.
Since most of our website features a clean white background (the standard for showcasing jewelry), I now often use white bleached coral. It adds a soft, organic, coastal feel while still keeping the site crisp, modern, and cohesive.
How Our Staging Has Evolved
From paper and sunlight to macro lenses and photo cubes, our photography journey has grown alongside our craft. Every adjustment, every prop, every lighting choice is about one thing: capturing the soul of sea glass — its history, its imperfections, and its one-of-a-kind beauty — in the truest way possible.
|
2011 |
2012 |
||
Editing
You wouldn’t believe how I used to edit photos nearly 30 years ago — it was painstaking, pixel-by-pixel work, often literally editing one pixel at a time. It was slow, tedious, and time-consuming… but it was worth it.
Today, editing is a completely different story. With the help of macros and modern tools, the process is streamlined and efficient — so much so that I joke I could probably do it in my sleep. Even still, certain pieces can be tricky to photograph and edit. Jewelry with silver settings and soft pastel sea glass, for example, can be especially challenging on cloudy days. Because silver is a white metal and we shoot on a white background, getting the contrast and detail just right takes extra care.
We keep our editing as minimal and natural as possible, focusing only on removing background distractions and adding our logo. The goal is to let the jewelry speak for itself — to show you its true character, color, and craftsmanship just as it is.
To Sum It Up
I’ll be the first to admit — I’m not a “professional photographer.” Like many people in the digital age, I’m more of a point-and-shoot kind of person. But I always aim to make our photos feel original and distinctive, so they stand out in a sea (pun intended!) of other sea glass artists online.
Every image you see on our site is designed to be an honest, beautiful representation of the piece — not overly polished or filtered, but real, authentic, and true to the art.
Our Customers
One of the most common compliments we hear from customers is that, even though we work hard to photograph each piece as accurately as possible, they still look even more stunning in person. And honestly, that’s the best compliment we could hope for.
Whether you decide to purchase a piece or simply enjoy browsing through our gallery, I hope you appreciate not just the jewelry itself but also the time, care, and love that goes into photographing the sea glass — each image a tiny celebration of nature’s artistry.
Warmly,
Linda Jereb
Designer & Owner, By The Sea Jewelry
Share: